I still remember standing in my first garden with a packet of carrot seeds in one hand and a fork in the other, completely frozen. Everyone seemed to know something I didn’t. How deep? How far apart? What if it all died? If that sounds familiar, take a breath. Vegetable gardening for beginners step by step isn’t about getting everything right on the first try. It’s about doing a few small things in the right order, then letting the garden teach you the rest.
This walkthrough is the one I wish someone had handed me: six clear stages, each with one action you can take today. No jargon, no expensive kit, no guilt if a crop fails. By the end you’ll know where to put your patch, how to prepare it, what to sow and when, how to keep plants alive through summer, and how to spot trouble before it spreads.
Step 1: Choose the Right Spot for Your Vegetable Patch
Most beginner disappointment traces back to the wrong location, not the wrong technique. Vegetables are sun-hungry. Aim for six to eight hours of direct light a day, ideally with the strongest sun falling in the middle of the day. A spot that’s bright at 8am but shaded by a fence from noon onward will grow leafy crops slowly and fruit poorly. Watch your garden for a full day before committing. You’ll be surprised how much a neighbour’s tree moves the shadows.
Water access matters almost as much. Carrying a can fifty metres gets old by week two, and that’s when watering quietly stops happening. Pick somewhere you can reach with a hose or place a water butt nearby. Shelter is the third check: a spot exposed to strong wind will shred young leaves and dry out soil fast, so a low hedge, fence or even a row of tall plants on the windy side helps enormously.
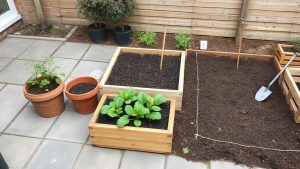
If you’re working with a balcony or courtyard, none of this rules you out. Containers on a sunny wall can produce salads, herbs, chillies and even compact tomatoes. The rules are the same, just smaller: sun, water, shelter.
Do this today: Stand in your proposed spot at three different times of day and note where the sun lands. Take a photo each time so you can compare.
Step 2: Prepare the Soil Without Digging Up Your Whole Weekend
New gardeners often think they need to double-dig the entire plot. You don’t. Vegetables need loose, fertile ground with decent drainage, and you can get there with far less effort.
Start by clearing weeds, especially perennial ones with deep roots like bindweed or dock. Pull what you can by hand and don’t shake soil back into the bed, since that scatters seeds. Then spread a layer of well-rotted compost or manure across the surface, roughly five to eight centimetres deep, and let worms and weather work it in over a few weeks. If your soil is heavy clay, add grit or composted bark to open it up. If it’s sandy and drains instantly, compost is your best friend because it holds moisture.
You don’t need to dig. A no-dig approach means fewer weeds germinate and soil structure stays intact. Just layer organic matter on top and plant into it. It feels almost too easy, but it works.
Containers need different treatment. Use a quality peat-free potting compost rather than garden soil, which compacts in pots and drains poorly. Add a slow-release fertiliser at planting time.
Do this today: Clear one square metre properly. That’s your starting bed. You can expand later once you see what grows well.
Step 3: Pick Easy Crops and Know When to Sow Them
The fastest way to lose confidence is to start with fussy plants. Leave aubergines, celery and cauliflower for year two. Begin with crops that forgive mistakes.
Salad leaves are almost foolproof and give you something to harvest within a month. Radishes are ready in as little as four weeks, which is deeply satisfying when you’re impatient. Courgettes (zucchini) grow enormous and produce relentlessly. Runner beans climb happily up a simple frame. Chard keeps cropping for months. Potatoes in a bag are a great introduction to root crops. Herbs like parsley, chives and mint will reward even neglectful watering.
Timing depends on your climate, but the principle is simple: sow cool-season crops like spinach, peas and lettuce in spring and again in late summer, and warm-season crops like tomatoes, beans and squash once the last frost has passed and the soil has warmed. Seed packets give sowing windows for your region, so read them rather than guessing.
Don’t sow everything at once. Succession sowing, where you plant a small row every two to three weeks, gives you a steady supply instead of a glut followed by nothing.
Do this today: Buy two packets of seed: one fast crop like radish and one long-season crop like a bush tomato. That’s enough to start.
Step 4: Plant and Water Like You Mean It
This is where beginners either overdo it or underdo it. Both cause problems, so let’s get the basics right.
Sow seeds at the depth stated on the packet, usually two to three times their own thickness. Space them as directed, because crowded seedlings compete for light and water and end up weak. If you’re transplanting seedlings you raised indoors, harden them off first by putting them outside for a few hours a day over a week. Skipping this step shocks them and sets growth back by weeks.
Water deeply and less often rather than lightly and daily. A good soak encourages roots to grow down, which makes plants more resilient during dry spells. Water in the morning where possible, aiming at the soil rather than the leaves, since wet foliage invites disease. Check moisture by pushing a finger two centimetres into the soil. If it’s dry at that depth, water. If it’s damp, wait.
Mulching around plants with compost, straw or grass clippings cuts watering by a surprising amount and suppresses weeds at the same time.
Do this today: Water one bed properly and time how long it takes to soak the top fifteen centimetres. That’s your new watering benchmark.
Step 5: Keep Plants Healthy Through the Season
Once things are growing, your job shifts from planting to tending. Weeds compete for water and nutrients, so hoe or hand-pull them while they’re small. A five-minute pass each week beats an hour-long rescue mission later.
Feed hungry crops. Leafy vegetables want nitrogen, which compost and a general-purpose organic fertiliser provide. Fruiting crops like tomatoes and peppers benefit from a potassium-rich feed once flowers appear. If leaves turn yellow, growth stalls or flowers drop without setting fruit, that’s usually a nutrient or watering issue, not bad luck.
Watch for pests early. Aphids cluster on soft new growth and can be blasted off with a firm jet of water. Slugs and snails come out at dusk, so a torchlit patrol after rain is oddly effective. Netting protects brassicas from pigeons and cabbage white butterflies. The trick is to look at your plants properly every couple of days, not just when something looks obviously wrong.
Do this today: Walk your patch with a mug of tea and inspect the undersides of five leaves. You’ll spot problems long before they spread.
Step 6: Harvest at the Right Moment and Troubleshoot Common Problems
Harvesting is the reward, and it’s also a skill. Pick salad leaves young for tenderness and cut them rather than pulling, so they regrow. Radishes turn woody if left too long, so pull them small. Courgettes should be picked at around fifteen centimetres, while they’re still firm. Beans taste best before the pods bulge. The general rule: harvest little and often, and the plant keeps producing.
Use a clean sharp knife or scissors. Tugging damages stems and can uproot whole plants. And don’t leave mature crops sitting in the ground, because they stop generating new ones.
Now, the troubleshooting. If seedlings collapse at soil level, that’s damping off, usually caused by cold, wet conditions and overcrowding. Improve airflow and thin them. If leaves are pale with yellow patches, suspect a nutrient shortage or too much water. If plants flower but nothing sets, check for pollinators and avoid spraying anything during the day. If everything is slow, check sunlight hours before blaming yourself. Nine times out of ten, the garden is telling you something specific, and the fix is small.
Do this today: Pick something, even if it’s just a single radish. Eating what you grew is what keeps beginners going.
Frequently Asked Questions
How much space do I need to start a vegetable garden?
A single square metre is plenty for a first attempt. You can grow salad leaves, radishes and a couple of herbs in that space. Containers work just as well if you only have a balcony or patio.
What’s the easiest vegetable for a complete beginner to grow?
Radishes and salad leaves are the most forgiving. Both germinate quickly, need little attention and give you a harvest within weeks, which builds confidence fast.
How often should I water my vegetable garden?
Water deeply two or three times a week in dry weather rather than a light sprinkle every day. Check the soil two centimetres down and water only when it feels dry at that depth.
Why are my seedlings dying or turning yellow?
Usually it’s too much water, poor airflow or overcrowding. Thin the seedlings, ease off the watering and make sure they’re getting enough light and space to grow.
Do I need to dig my vegetable bed every year?
No. Adding compost to the surface and letting worms do the work keeps soil healthy without annual digging, and it means far fewer weeds germinate.