You want a garden. That part is settled. What isn’t settled is everything else, because almost every article about growing things assumes you already have a bed, a border, or at least a rough idea of what you’re doing. You have a bare patch of grass, or a balcony, or a landlord who frowns at holes in the lawn, and you’re stuck comparing advice that doesn’t match your situation.
So let’s reframe it. Learning how to start a garden from scratch isn’t really about picking the best method. It’s about picking the starting point that fits your space, your budget, and how long you plan to stay put. Get that decision right and the rest becomes ordinary work rather than a series of expensive mistakes.
Below are the three realistic starting points, what each one actually costs you in money and effort, and a first-month checklist that works whichever route you choose.
The three starting points, compared honestly
There’s no single winner here. Containers, raised beds, and open ground each solve a different problem, and the wrong choice usually shows up about six weeks in, when you’re either watering twice a day or staring at a bed you can’t afford to fill.
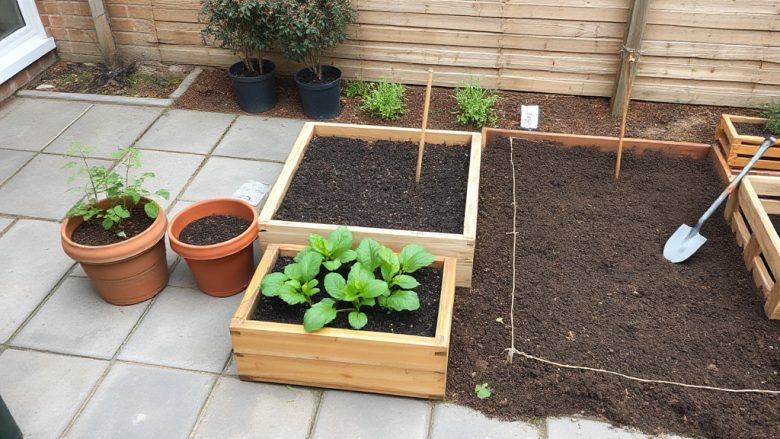
Containers. A container garden is the fastest route from nothing to something growing. You need pots, compost, and a spot that gets decent light. A bag of multipurpose compost and a few 30cm pots will get you started for the price of a takeaway, and you can move the whole operation if you move house. The trade-off is maintenance. Pots dry out quickly, the compost runs out of nutrients within a season, and root space limits what you can grow. Salad leaves, herbs, chillies, dwarf beans, and most strawberries do well. Full-size courgettes, maincrop potatoes, and anything that wants a metre of root run do not.
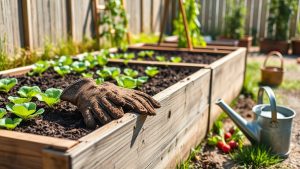
Raised beds. A raised bed is the middle path, and for most renters and new homeowners it’s the sensible one. You build or buy a frame, fill it with a soil and compost mix, and you get better drainage, easier weeding, and control over what your plants are actually growing in. It also solves the problem of bad ground — heavy clay, rubble, or decades of builder’s waste. The cost is front-loaded: timber and enough growing medium to fill the bed properly. A bed that’s 1.2m by 2.4m and 25cm deep needs roughly three-quarters of a cubic metre of material, which is more than most people expect. Build it too shallow and you’ll spend the summer watering.
In-ground beds. Digging into the soil is the cheapest option per square metre and the best one if you have decent earth and a long-term plan. You’re not buying containers or timber, and plants can send roots down as far as they like. But you inherit whatever is already there. That might be lovely loam. It might be compacted clay with a hidden layer of rubble 15cm down. Before you commit, dig a hole roughly a spade’s depth and a spade’s width, and look at what comes out. If it’s dark, crumbly, and full of worms, you’re in luck. If it’s grey, sticky, and smells sour, you’ll need to improve it with compost over a season or two before it grows much.
If you’re renting, or you might move within two years, containers and raised beds are the safer bets because you can take them with you or dismantle them. If you own the place and plan to stay, in-ground is worth the slower start.
Choosing your spot and getting the basics right
Before you spend anything, watch your space for a day. Not a whole week — one clear day is enough to learn most of what you need. Note where the sun lands at 9am, at 1pm, and at 5pm. Most vegetables and flowering annuals want six hours of direct sun or more. Leafy crops and herbs like mint, chives, and parsley will tolerate four. If your only option is a north-facing spot that never gets direct light, be realistic: grow leafy greens and shade-tolerant herbs, and accept that tomatoes will struggle.
Water access matters more than most beginners expect. A bed at the far end of a garden with no tap nearby becomes a chore, and chores get skipped in July. Keep your growing space within a hose length of a tap, or accept that you’ll be carrying cans.
Then there’s the question of what to put in the ground. Don’t buy a trolley full of different composts and fertilisers on day one. A decent multipurpose compost covers seed sowing, potting on, and filling containers. For in-ground beds, dig in two or three bags of well-rotted organic matter per square metre and let the worms do the mixing. That’s it for year one. Specialist feeds can wait until you know what you’re growing and what it’s short of.
Seeds versus young plants is another decision people agonise over unnecessarily. Seeds are cheaper and give you far more variety, but they need warmth, light, and attention in the early weeks. Young plants cost more per unit but skip the fragile stage entirely. A reasonable compromise for a first year: buy young plants for anything slow or fussy — tomatoes, peppers, aubergines — and sow seeds directly for fast, forgiving crops like salad leaves, radishes, and peas.
One more thing worth saying plainly: start smaller than you think you should. A single raised bed or six containers is plenty for a first season. The most common reason first gardens fail isn’t pests or weather. It’s that someone planted forty square metres in April and couldn’t keep up with the watering and weeding by July.
Your first four weeks, step by step
This is the part most guides skip. Here’s what to actually do, in order, over your first month.
Week one: decide and measure. Pick your starting point from the three above. Measure the space you’ve got and write the dimensions down. Check where the sun falls and where the nearest tap is. Set a rough budget — containers can be done for very little, raised beds cost more up front, in-ground is cheapest but may need soil improvement. Decide now, because changing your mind after you’ve bought materials is where money gets wasted.
Week two: buy and set up. If you’ve chosen containers, buy pots, saucers, and compost, and position them before you fill them — wet compost is heavy. For raised beds, assemble the frame on level ground, line the base with cardboard if you’re placing it over grass, and fill with a mix of topsoil and compost. For in-ground, mark out the bed with string or sand, strip the turf, and dig over the top 20cm, removing stones and perennial weed roots as you go. Don’t rotovate — it chops weed roots into pieces that each grow into a new plant.
Week three: plant something easy. This is the week to get plants or seeds in. Choose a small number of reliable crops for your first season: salad leaves, radishes, spring onions, peas, and one or two herbs will give you something to harvest within weeks and build confidence. If you’re sowing direct, follow the spacing on the packet — overcrowding is the other classic beginner mistake, and thinning seedlings feels wasteful until you see how much better the remaining plants do.
Week four: water, watch, and resist the urge to add more. Water in the morning if you can, aiming at the soil rather than the leaves. Check for slugs in the evening with a torch — it’s the fastest way to find out what’s eating your seedlings. Pull weeds while they’re small, when they come out with two fingers and a bit of wrist. And leave the rest of the space alone. You can expand next year, once you know what you actually enjoy growing and eating.
After that first month, the rhythm settles. Water when the top inch of soil is dry, feed containers every couple of weeks through summer, and keep harvesting — picking regularly keeps most crops producing rather than bolting or going to seed.
Questions people ask before they start
What’s the cheapest way to start a garden from scratch?
In-ground beds cost the least in materials, since you’re not buying containers or timber. If your soil is poor, the cheapest fix is digging in well-rotted organic matter rather than replacing the soil entirely. Containers can also be done cheaply if you reuse buckets, crates, or old trugs, as long as you drill drainage holes in the base.
How much sun does a new garden need?
Six hours of direct sun is the practical target for most vegetables, fruiting plants, and flowering annuals. Four hours will suit leafy crops and most herbs. Less than that and you’re limited to shade-tolerant plants, which is fine — just choose accordingly rather than fighting it.
Can I start a garden in autumn or winter?
Yes, with adjusted expectations. Autumn is a good time to build beds, improve soil, and plant garlic, broad beans, and spring bulbs. Growth slows over winter, so you’ll mostly be preparing rather than harvesting. If you’re using containers, keep them somewhere sheltered and cut back on watering, since soggy compost in cold weather does more harm than dry compost.
How do I know if my soil is any good?
Dig a spade-depth hole and look. Dark, crumbly soil with visible worms and a fresh, earthy smell is good. Grey or orange sticky clay, or soil that smells sour or drains into a puddle, needs work. A simple test: squeeze a handful. If it holds a tight ball that doesn’t crumble when poked, you’ve got a lot of clay and will need to add organic matter over time.
Do I need to test my soil for contaminants?
If you’re growing in open ground near old industrial sites, railway land, or where painted timber has rotted down over decades, it’s worth a basic soil test before growing food. Raised beds with brought-in growing medium avoid the question entirely, which is one reason they’re a popular choice on uncertain ground.